


Let AI see what you are building! 👀
How to use MCP, Playwright and Rules to give AI visual feedback


One thing that always frustrated me about Copilot and Cursor is that agents could not see the results of their suggestions.
It was like pair programming with a blind person:
👦🏻: Create X
🤖: Here it is!
🤦🏻♂️: Nooo, it doesn’t look like X
🤖: Here it is!
🤦🏻♂️: It’s even worse now, you’ve broken Y
🤖: Here it is!
This workflow works, but it’s clunky. The AI is coding in the dark. It can't check its own work. It can't tell if something looks broken. And every tiny mistake needs to go through a human(you) to get fixed.
That’s a lot of back-and-forth for something that should be automated.

What If Your AI Could Actually See? 👀
Imagine if your AI could open the app in a browser, take a screenshot, and say,
🤖 - “Hmm, the button looks a bit off-center - let me fix that.”
Well, this is exactly what you can do by letting your AI assistant use Playwright! 🤸🏻
👦🏻: Create X
🤖: Here it is…no, wait, it doesn’t look like X
🤖: Here it is..no, it’s even worse now, I’ve broken Y
🤖: Here it is! It’s working, I checked it! 💙
I’m sure this feature will soon be built into Cursor and Cline, as introspection is essential, but until then, you can easily create it manually by firing up an MCP server and writing some basic rules.
Here’s how to do it.
We will be defining 2 separate workflows:
Textual Verification (TV), ie.
Reading.
This will allow your AI to read the DOM, look at the HTML elements and verify that the content is correct.
This can tell you whether 2+2 displayed 4 in your app, but it can’t tell you in which colour or where on the screen it was rendered.Visual Verification (VV), ie.
Seeing.
This will allow AI to see how the page looks visually.
Think: colours, shapes, layout, responsiveness.

Textual Verification Flow
Ok, let’s see what this looks like in practice. In a React app, let’s ask Cursor AI to create something we know is going to be “buggy” - just to see if it spots it. Floating-Point Arithmetic issue is always a good one!

Notice the “TV“ at the end - it’s a custom Rule for “Textually Verify“.
We’ll get back to that in a second!
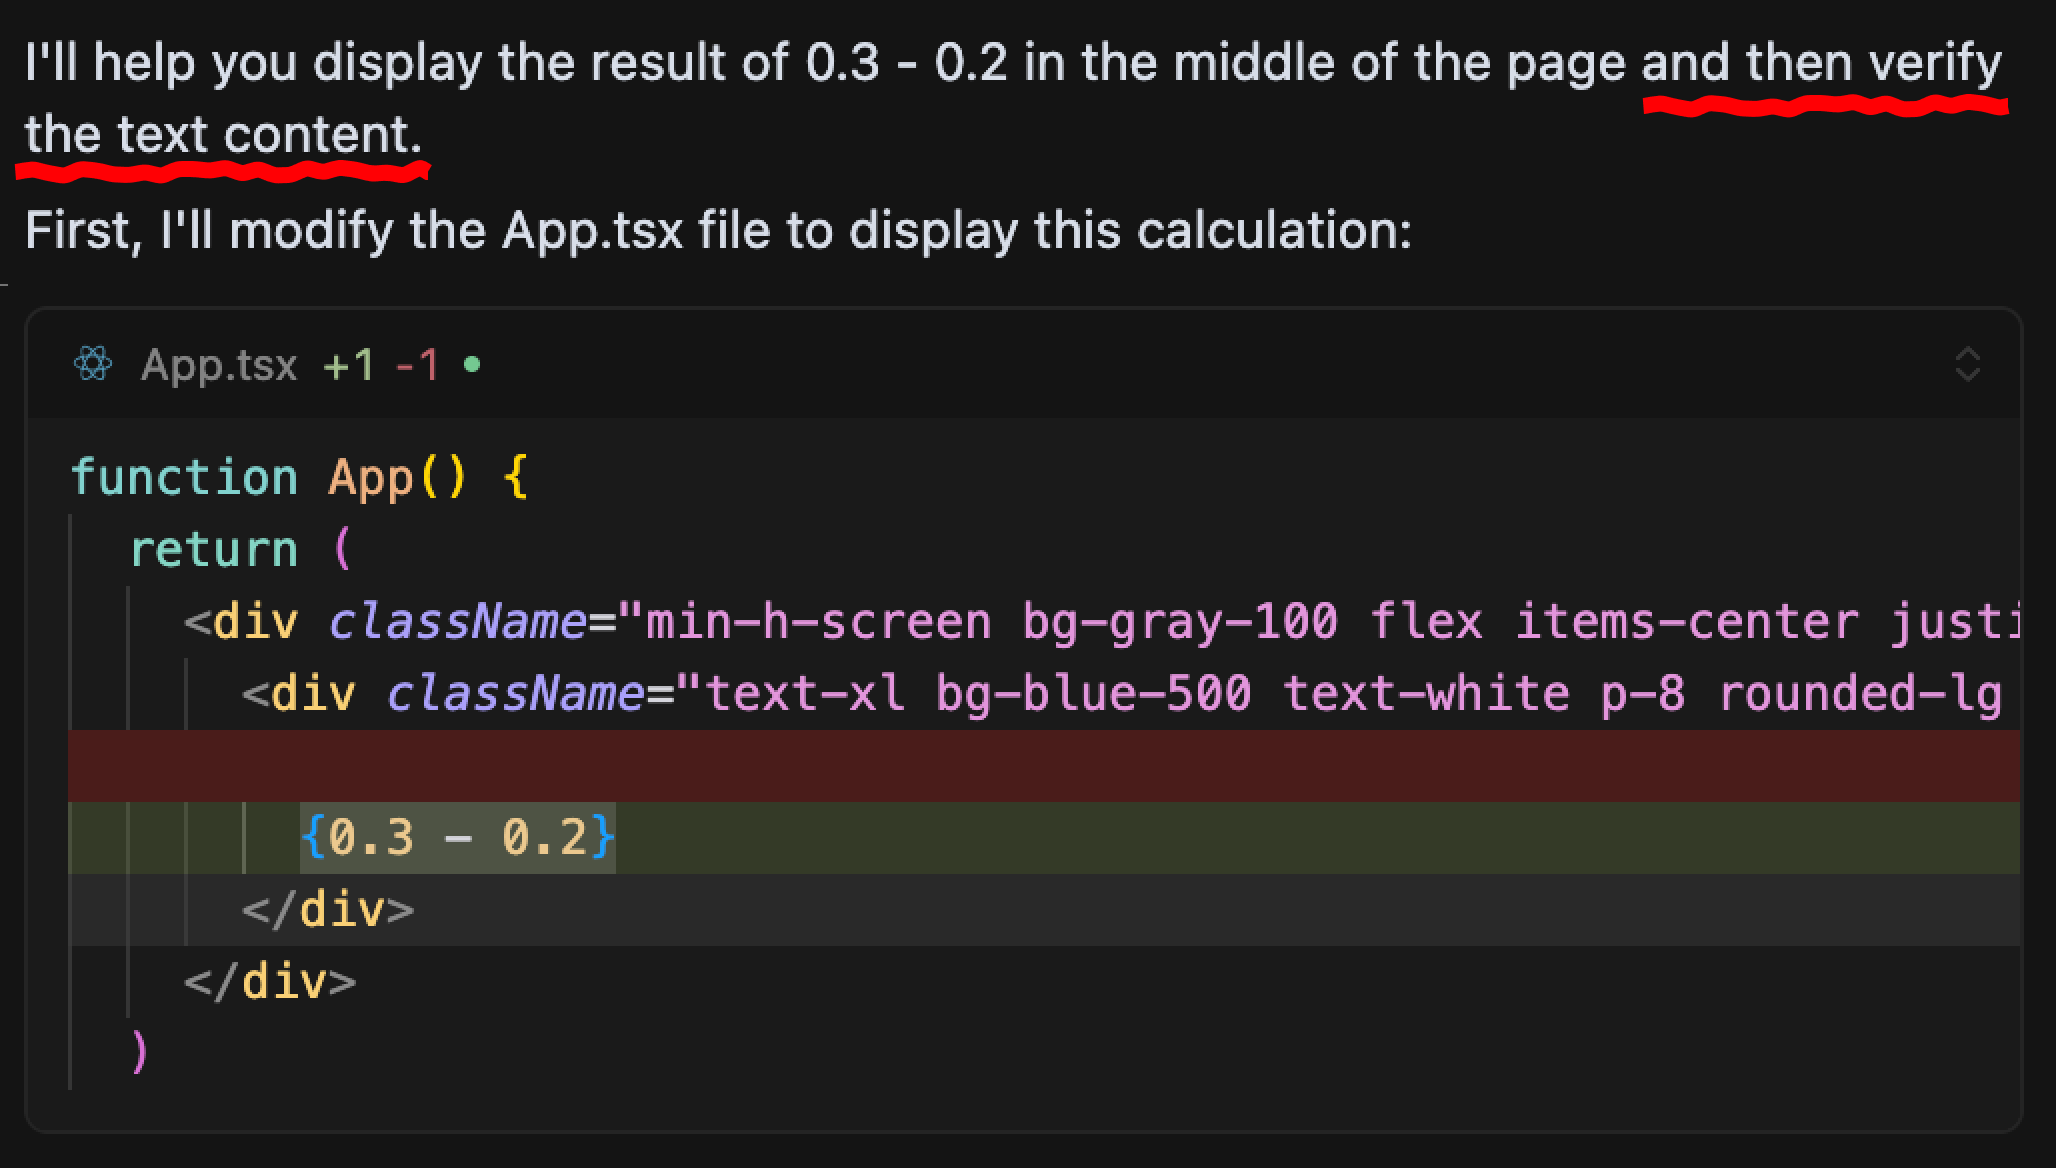
Cursor happily creates the content and the page renders as …well… (un)expected:

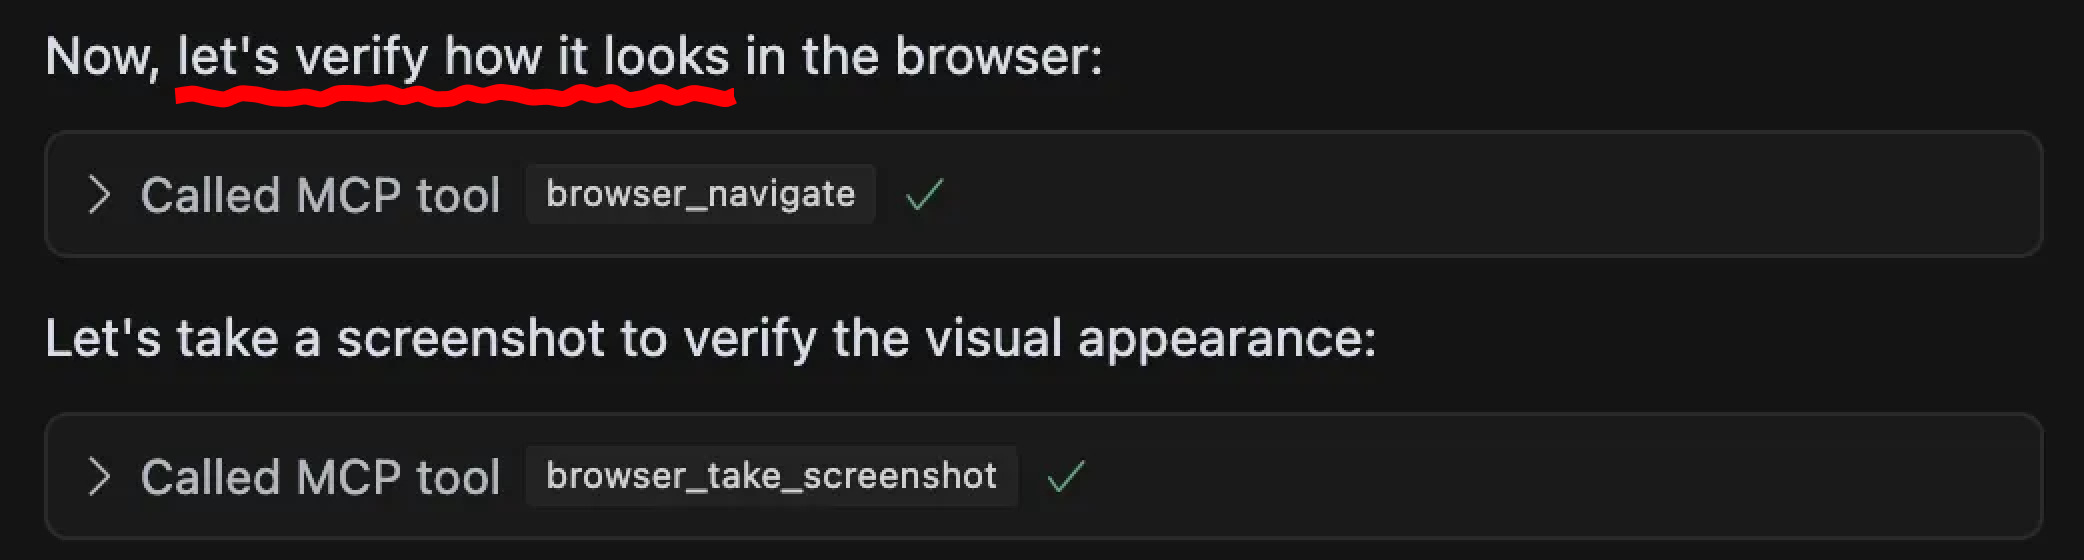
Luckily, Cursor doesn’t stop here, this is where the “TV“ rule kicks in!


All of the above happened in a single prompt! 🎉
Without this feedback loop, AI would not have found or pointed out this issue.
This is incredibly powerful as the agent can inspect the result in the real, running app - so you can even check code paths that require API responses or complex async workflows.

Visual Verification Flow
Now let’s try something visual - something you can’t verify just by inspecting the DOM.

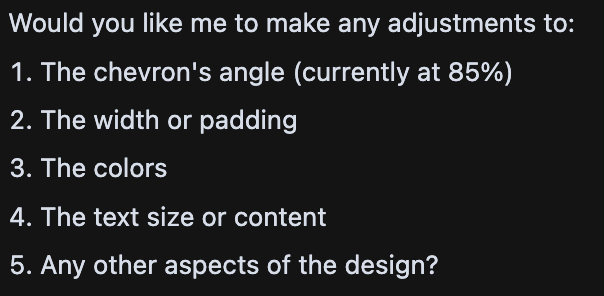
Notice the VV at the end of the prompt above. It’s a rule for Visual Verification. After the agent suggests the code, it will verify the result by taking a screenshot:
This example took several iterations to complete, but with each pass, the agent visually verified its changes, recognised what was wrong, and made adjustments.

Once it got the shape right, it needed some extra nudging to check if the text is cut off. Once prompted, the agent could also update the Rule to check for text clipping issues going forward.
This really opened a completely new aspect of AI-assisted coding for me:
Now the agent can see what it’s doing and assist with design work, relying on its own feedback loop!
🎯
This also makes the agent’s follow-up suggestions more meaningful, too - as it can now visually verify the changes:
Note: Not all LLM-s can analyse images! For best results, for prompts that require Visual Verification, set the model to an LLM that support image recognition, eg. Claude 3.5+.

Ready to set it up?

It’s fairly straightforward. All you need is a Playwright MCP and some Rules to instruct the agent how to use it.
1. Install Playwright MCP
There are many to choose from, depending on your IDE and your dev environment setup. If you use devContainers, find one that supports SSE - this way you can run playwright inside the devcontainer(headless mode), or outside(browser window)
https://cursor.directory/mcp?q=playwright
Setup in 10 seconds:
1. add this to .cursor/mcp.json:
{
  "mcpServers": {
    "playwright": {
      "command": "npx",
      "args": [
        "-y",
        "@executeautomation/playwright-mcp-server"
      ]
    }
  }
}
Enable it in Cursor Settings → MCP:


2. Set up the Rules
Here are two generic VV and TV rules to start with.
Every time you run into an issue that the agent doesn’t notice or fix automatically, make AI fix it step-by-step in the same chat session, then ask it to update the rule with what it has learned. This way you’ll get more and more fine-grained Textual and Visual iterations.
---
description: shortcuts
globs: *.tsx
alwaysApply: true
---
# Cursor Shortcut Rules

## VV (Visually Verify)

### Description
When the user includes the shortcut `VV` in a prompt, it means to perform a visual verification and iteration process:

1. **Initial Verification**:
   - Open http://localhost:3000/ in the browser
   - Take a screenshot of the current state
   - Verify that the visual appearance matches expectations
   - Report any visual issues or confirm correct rendering

2. **Iterative Improvement** (if issues found):
   - Make specific visual changes (e.g., CSS properties, dimensions)
   - Focus on one aspect at a time (shape, size, spacing, etc.)
   - Take new screenshot after each change
   - Analyze if the change achieved the desired effect
   - Document what worked/didn't work
   - Propose next adjustment if needed
   - Build on successful changes
   - Avoid repeating failed approaches

### Best Practices
- Start with major properties before fine-tuning
- Document each iteration's purpose and outcome
- Keep track of successful values
- Note any breakpoints or responsive behavior changes
- Test edge cases (content overflow, different screen sizes)
- Follow progressive enhancement approach

### Use Cases
- Checking and refining layout and styling
- Verifying and adjusting component colors
- Verifying and adjusting component positioning
- Confirming and improving responsive design
- Validating and enhancing visual effects
- Shape refinement and spacing adjustments
- Content alignment optimization

## TV (Textually Verify)

### Description
When the user includes the shortcut `TV` in a prompt, it means to perform a text verification and iteration process:

1. **Initial Verification**:
   - Navigate to http://localhost:3000/
   - Use either:
     - `playwright_get_visible_text` for plain text verification
     - `playwright_get_visible_html` for HTML structure verification
   - Verify that the expected content is present and correct
   - Report whether the verification passed or failed

2. **Iterative Improvement** (if issues found):
   - Fix the issue
   - Verify content after each change
   - Check if text renders as expected
   - fix and verify again, until all issues are resolved
   - Document changes and their effects
   - Propose refinements based on results

### Best Practices
- Start with content structure before fine-tuning
- Verify text formatting and styling
- Document all changes and their impacts

### Use Cases
- Verifying and refining dynamic content
- Checking and improving text content rendering
- Validating and enhancing HTML structure
- Text formatting optimization
- Content structure refinement
- Internationalization testing

## General Best Practices
- Choose appropriate shortcut based on the task (Visual vs Textual)
- Document all changes and their effects
- Test across different viewport sizes and content scenarios
- Follow progressive enhancement approach
- Maintain a clear record of iterations and outcomes
- Consider both immediate fixes and long-term maintainability
That’s it!
To try it, simply open the chat and type any instruction, followed by VV or TV.
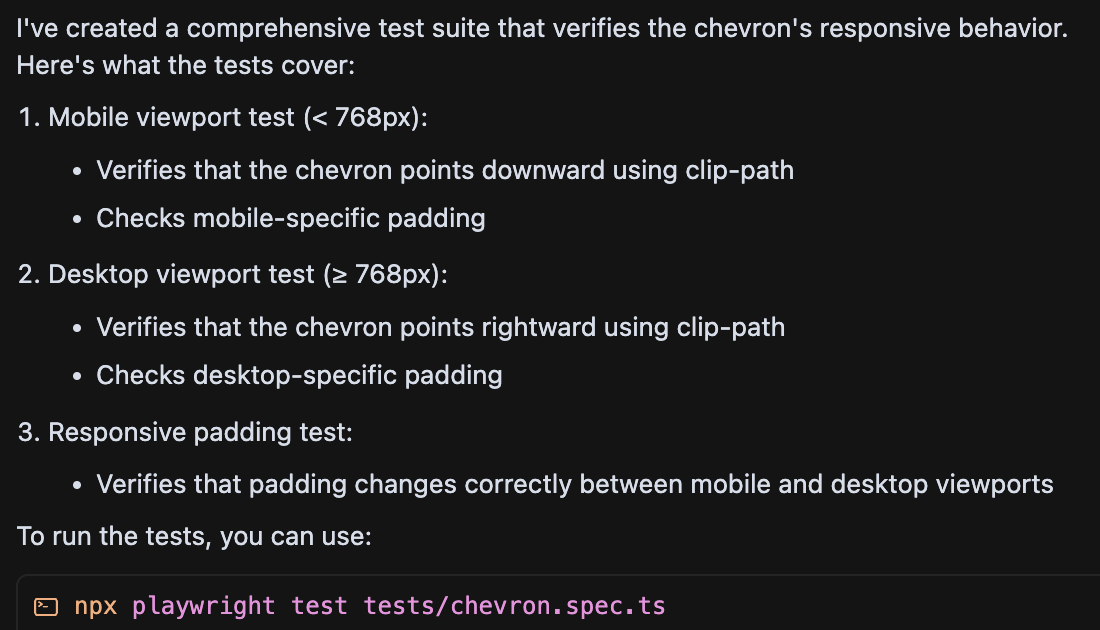
Bonus Feature: Automation Testing! 🤖
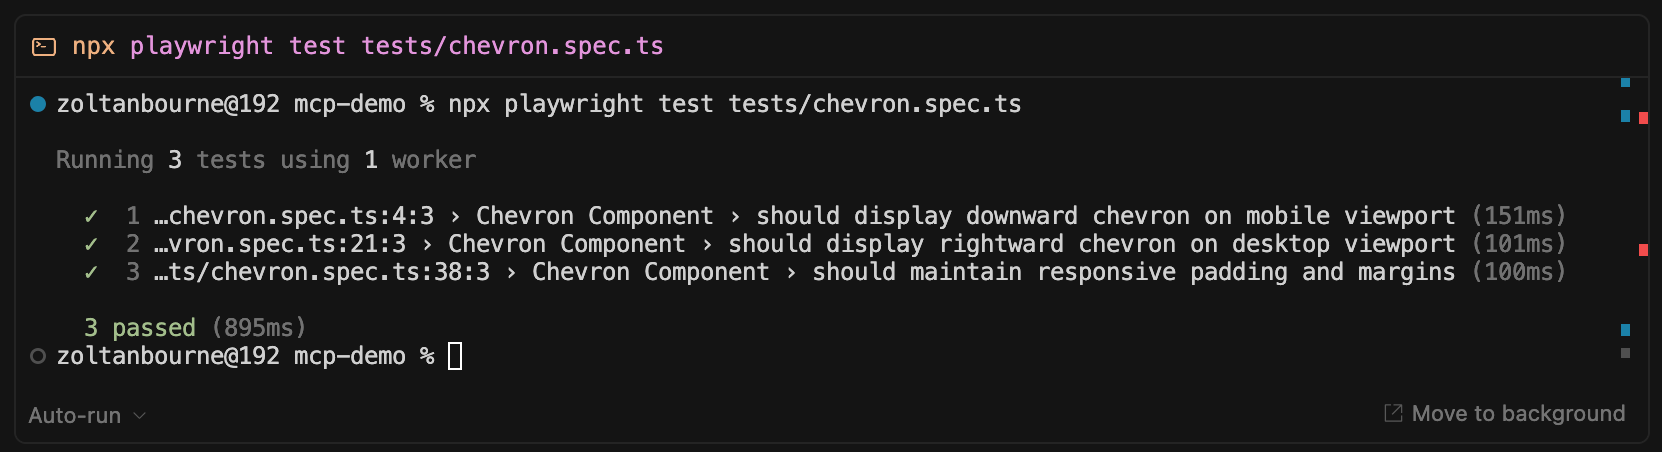
Now that you have a full Playwright workflow set up, you can also prompt the agent to create Playwright Tests!


Rules and MCPs completely redefine the concept of “vibing.”
If “vibed” code can go through visual feedback loops and generate comprehensive automation tests, it has the potential to evolve from simple hacking into a robust, self-validating development workflow.
We are not quite there yet, but it’s looking incredibly promising!
Check my other article on Rules as well:

That’s all, folks!
Thank you for reading this, I hope you found it useful!
I would love to hear your thoughts in the comments!
🩵